 |
| All Images via Newfoundjoye |
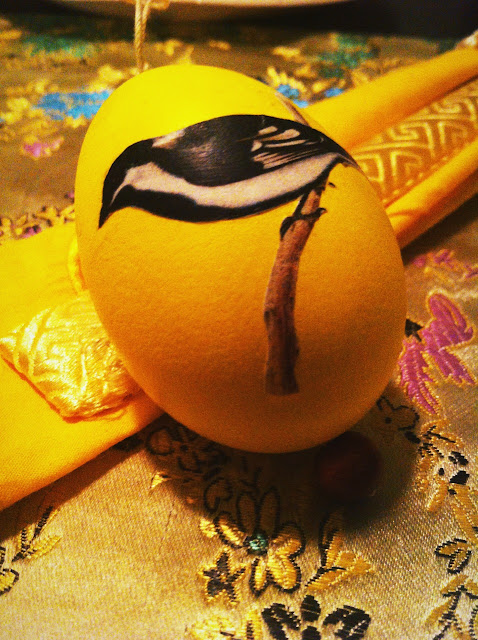
If you couldn't tell, I spend a great deal of time making things. Holidays are perhaps the best excuse known to man for me to get some ideas together. My coworkers are the best audience. They appreciate gifts and they get them fairly regularly. For Easter, I didn't want to step on anyone's (religious) toes, so I decided to make Easter eggs. Detailed instructions are after the jump.
Difficulty: Easy/Moderate
Expense: Affordable (maybe about $20) to Moderate ($50)
Supplies: Real or wooden eggs, Blas-Fix egg blower, acrylic paint, image cutouts, Mod Podge (Matte), paintbrush, string (optional), wire (optional), long needle (optional), beads (optional)
This is an easy project, but it becomes difficult because it requires a lot of steps. I found it on MarthaStewart.com, so you can find the same information and more over there. If you have wooden or pre-blown eggs, skip to step 2.
Step 1: Hollowing out eggs
Hold eggs over a bowl and use the Blas-Fix egg blower as directed. You basically have to pierce one end of the egg with the drill tool before using the pump to draw the yolk and white from it. Then, rinse out the inside of the egg and let dry. [Watch Martha do it here] If you plan to hang your eggs, I would recommend drilling the other end of the egg before moving ahead to step 2. Alternatively, you can choose to hollow your eggs out by piercing both ends of your eggs. Once you have broken and stirred the yolk with a pin/needle, you can use a plastic syringe to blow the eggs out. The Blas-Fix saves time, and it was my method.
 |
| You can use multiple coats of paint to reduce streaks. I used extra-large, white eggs and large brown eggs to make my Easter eggs. |
Step 2: Painting the eggs
An egg is an awkward item to paint. I recommend mixing your color and painting the egg in sections to avoid leaving fingerprints. Eggs also tend to roll around, so I actually perched them on their unpainted/dry side until they were dry. You might have to do a few coats of paint.
Step 3: Stringing the eggs [optional]
If you have a wooden egg, or you want to put your eggs into a pedestal of some kind, you don't need to do this step. If you are stringing your eggs up, I would start by making a slip knot in your string. Then, using your needle or wire, pierce through the egg and pull the string through. You'll want the knot to end up on the top of the egg, so be careful of which end of the egg you pull your string through. You can either add a bead to the base of the egg, or you can tie a very nice knot to keep the egg from slipping through the string. I did beads, but knots can look very sleek. If you have a hard time getting the needle/wire through the egg, use a well-placed light to see through the egg. Darkly painted eggs will be tough to string, but you can do it if you have a strong light to guide your way.
 |
| You'll notice that I had not strung this egg yet. I accidentally broke an egg trying to string it after applying the image, so it was a waste of the cutout. |
Step 4: Applying the images
Now that you have painted and strung your eggs, you can apply your paper cutouts. Using Mod Podge, paint a thin layer onto the back of the image. Then, place it gently onto the egg and use your brush and Mod Podge to adhere the cutout to the egg. I found that my paper was a bit thin, so I had to be careful of rubbing the ink onto some of my lighter-colored eggs. Let the Mod Podge dry. If you put on a thick coat of Mod Cloth, you can use soapy water to remove some of it, but it could damage your image. Don't be too heavy with that brush. In general, it will dry matte, so no one will know if you used a bit much. If you were wondering, I searched Wikimedia Commons for ornithology illustrations for those fun birds.
 |
| My chicks in a row |
Good job! You should have yourself some nice, professional-looking decoupage eggs.

No comments:
Post a Comment
Tell me something good.